Skip to main content
Menu
Home
Photo Gallery
Our Practice
Our Practice Overview
Your Consultation
Financing Options
Seminars
Plastic Surgery Concierge Services
News Room
Specials and Promotions
Meet Dr. Petti
Meet Dr. Petti
Online Reviews
Written Testimonials
Publications
Surgical Procedures
Facial Rejuvenation
Facial Rejuvenation Overview
Facelift
Neck Lift
Cheek Lift
Eyelid Lift (Blepharoplasty)
Brow Lift
Rhinoplasty
Fat Transfer
SmartSkin™ CO2 Laser Skin Resurfacing
PrecisionTx™ Laser Lift
Breast Enhancement
Breast Enhancement Overview
Breast Augmentation
Breast Implant Revision
Breast Lift with Implants
Breast Lift
Breast Reduction
Mommy Makeover
En Bloc Capsulectomy Breast Implant Removal
Fat Transfer
Body Contouring
Body Contouring Overview
WarmSculpting™ with SculpSure
®
Smartlipo Triplex™
Liposuction
Tummy Tuck (Abdominoplasty)
Mommy Makeover
Body Makeover after Weightloss
Fat Transfer
Cellulite Treatment with Cellulaze™
Vein Treatment
Post-Ozempic
®
Treatments
Male Plastic Surgery
Gynecomastia Surgery
Plastic Surgery Through the Ages
MyEllevate
®
Neck Lift
Non-Surgical Rejuvenation
Non-Surgical Rejuvenation Overview
WarmSculpting™ with SculpSure
®
Light & Laser Treatments
Light & Laser Treatments Overview
CoolPeel™ CO2 Laser Skin Resurfacing
Fractional Laser Peels
SmartSkin™ CO2 Laser Skin Resurfacing
IPL (Intense Pulsed Light) FotoFacial™
2D & 3D Skin Rejuvenations
Laser Hair Removal
PrecisionTx™ Laser Lift
Cosmetic Injectables
BOTOX
®
Cosmetic
Dysport
®
JUVÉDERM
®
JUVÉDERM
®
VOLUX
®
XC
JUVÉDERM
®
SKINVIVE™
Restylane
®
Restylane
®
Eyelight
Sculptra
®
Aesthetic
KYBELLA
®
Lip Enhancement
Skin Rejuvenation and Body Treatments
Skin Rejuvenation and Body Treatments Overview
The Vivace™ Microneedling with Radio Frequency
Economical Non-Surgical Beauty Plan
Blog
Contact
Contact Us
Virtual Consultations
[email protected]
310.539.5888
Christine Petti, M.D, F.A.C.S. Board Certified Plastic Surgeon
Titan™ Gallery
Home
•
Photo Gallery
•
Titan™ Gallery
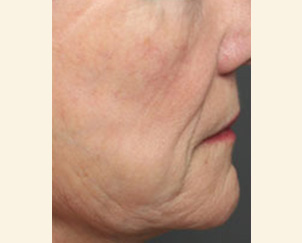
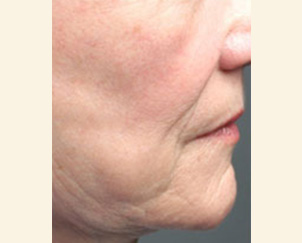
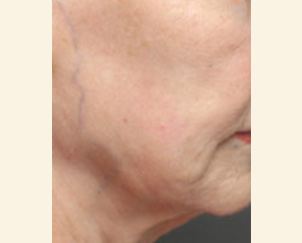
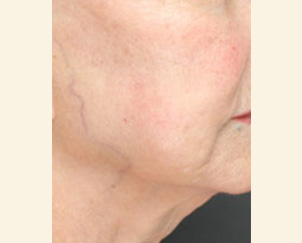
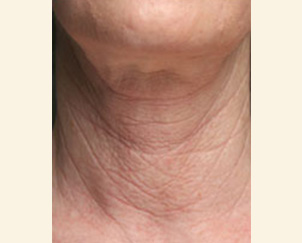
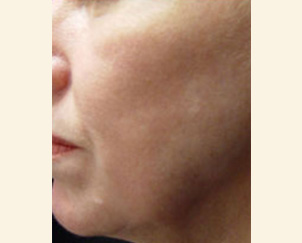
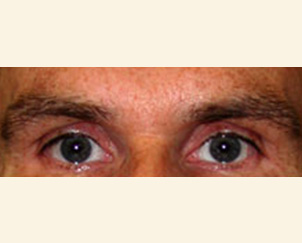
Patient 1
More Details
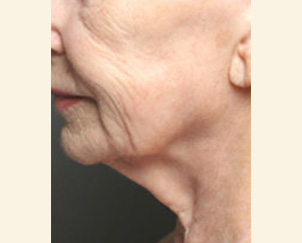
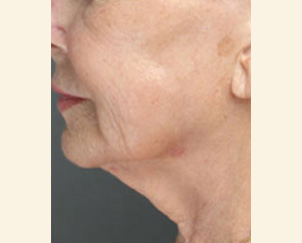
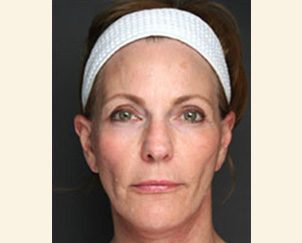
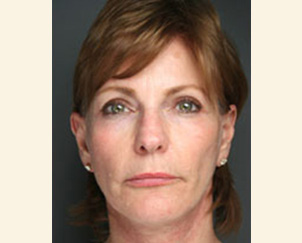
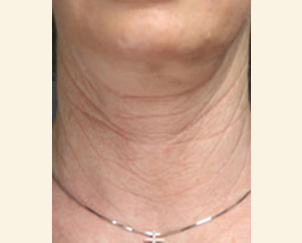
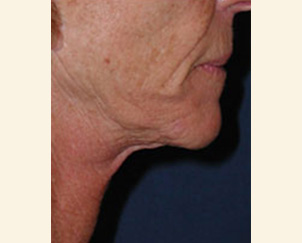
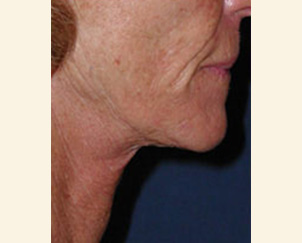
Patient 2
More Details
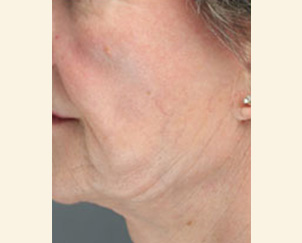
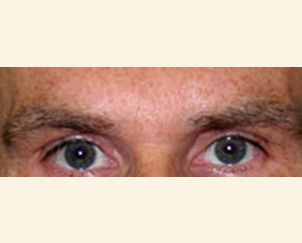
Patient 3
More Details
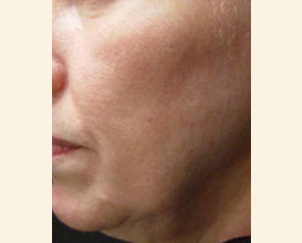
Patient 4
More Details
Patient 5
More Details
Patient 6
More Details
Patient 7
More Details
Patient 8
More Details
Patient 9
More Details
Back to Main Gallery